Starting Angular Projects With Nx
In this blog post I want to write down one possible way to start and architecture Angular projects using the Nx. I know that there are a lot of guides and even books out there but to have it written down in one place for me with all the current commands I am using building larger Angular applications I am creating this blog post.
Table of content
How to start an Angular project with nx
Creating libraries consumed by only one application
A “Feature” is not one library but multiple ones
The power of the ‘affected’ commands
Who is this article for?
This article is for developers and architects who want to build a large Angular application (or multiple ones) in a workspace and aim for a state of the art architecture with an nx monorepo. If you are reaching out to learn what libraries are and how they are used in your Angular nx workspace to build your architecture, if you want to avoid the common mistakes, if you want to learn the separation of the parts an Angular monorepo consists of and how nx can help you with that, this article is for you. You and your team will be able to start an Angular architecture after this article and know how to walk the first steps of nx.
What we are going to look at is
- How to start a project
- How to separate your application
- How build and use libraries
- What the commands for the separation are
And during this read we are going to learn how nx is helping us getting a nice and readable structure into our project which is extendable and straightforward.
Before we start you can find parts of those information on nx.dev and – although it is a little older – in this book here Enterprise Monorepo Angular Patterns, by Nitin Vericherla & Victor Savkin. I really recommend to read the book and take the knowledge before reading this article here. Much of the content in the article is based on what is written in the book. Trust me, it is incredibly good and redefines how Angular applications are being made. Read it now. Thank me later.
How to start an Angular project with nx
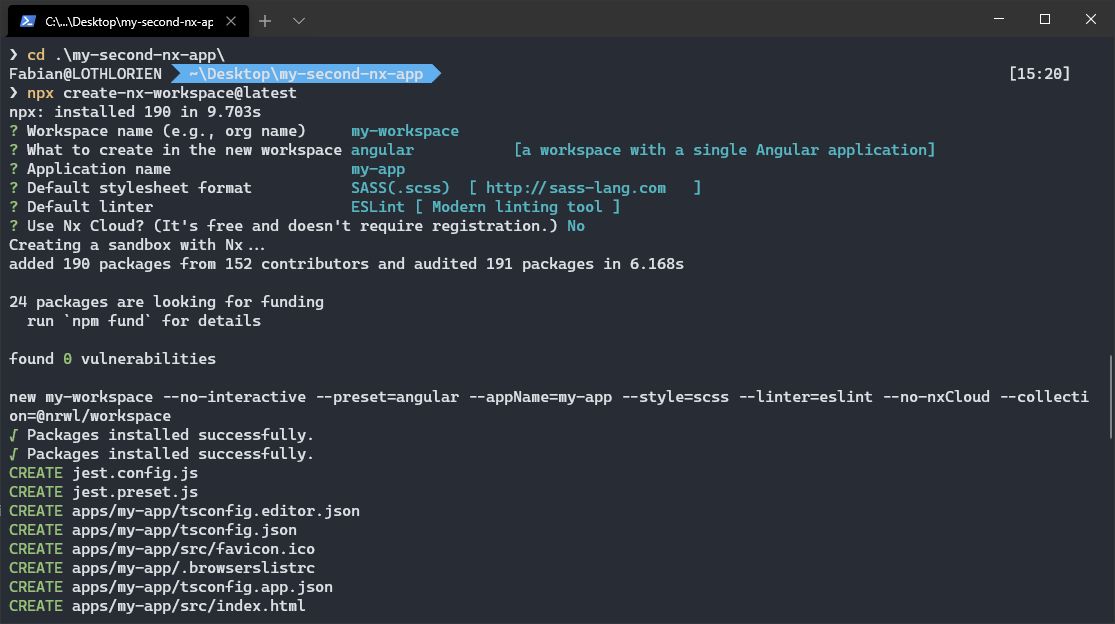
To get an nx workspace running the nx team provided us a very neat way to start using the
npx create-nx-workspace@latest
command. We can choose the Angular template which will add one app automatically for us right from the start.
After answering a few questions
We are facing an empty workspace like this.
.
├── .vscode
│   └── extensions.json
├── apps
│   ├── my-app
│   │   ├── ...
│   ├── my-app-e2e
│   │   ├── ...
│   └── .gitkeep
├── libs
│   └── .gitkeep
├── node_modules
│   └── ...
├── tools
│   ├── generators
│   │   └── .gitkeep
│   └── tsconfig.tools.json
├── .editorconfig
├── .eslintrc.json
├── .gitignore
├── .prettierignore
├── .prettierrc
├── angular.json
├── decorate-angular-cli.js
├── jest.config.js
├── jest.preset.js
├── nx.json
├── package-lock.json
├── package.json
├── README.md
└── tsconfig.base.json
which has one Angular application my-app in it.
The name of the project is either to be found in the angular.json as a property on the json
{
  "version": 1,
  "projects": {
    "my-app": { }, // <-- project name
    "my-app-e2e": { }, // <-- project name
  },
  // ...
  "defaultProject": "my-app"
}
Or it can be found in the nx.json file
{
  // ...
  "projects": {
    "my-app": { }, // <-- project name
    "my-app-e2e": { } // <-- project name
  }
}
Both files are getting updated automatically if you add a new project with an ng or nx command.
Adding Applications
In the future you can add new Angular applications with
nx generate @nrwl/angular:app my-second-app
etc.
After answering a few questions again the app is being added to the apps folder for you.
You can configure all the commands to use your specific tools for testing (karma jasmine or jest) or end to end testing (cypress or protractor). We are running with the latest tools here.
Rethinking Libraries
As written in the beginning I really recommend you to read the book I mentioned. When it comes to Angular Monorepos we have to rethink libraries a bit.
Normally we add libraries to share code between projects. This is absolutely valid and one of the use cases when it comes to the reasons creating a library. The code it outsourced and can be used from different applications, has to be maintained only once, can be tested etc.
When it comes to an Angular monorepo we have two new approaches we will introduce
- Creating libraries even if they are used by only ONE application
- A feature is not one library, but multiple ones
Creating libraries consumed by only one application
We create libraries in our monorepo not only for the ability to share them between applications. They can also be consumed by only one application. Call it an “app specific libs” if you want. That breaks down our application into smaller pieces which can be better named, better tested and provide us a better overview when we are defining and looking at our overall pieces the complete application consists of. The app can be well maintained then. As a side effect all the apps and libs are in the files we already mentioned (package.json and nx.json).
A “Feature” is not one library but multiple ones
Angular has to architectural approach to break down the application into (feature) modules which is imho a great way to separate the pieces of your application. As we know now we take that a step further and not only create a module in an application to separate features but we move them out into “app specific libs”.
Nx goes one step further and divides “features” in four kinds of libraries. This is also written in the book I mentioned, but to summarize:
-
Feature libraries represent the entry point and container components to that feature. These are the component where we can route to and this lib is used as entry point when loading our feature from the app. This features are lazy loaded from the app.
-
Ui libraries hold presentational components which are used by the feature components in the feature lib. They do not know data-services, they are getting the data passed in via
@Input()decorated properties and help us to show the data they received. They only care about how things have to look, not where the data comes from. -
Data-Access libraries are abstracting the data access and calls to a backend API like NodeJS, ASP.NET Core, etc.
-
Utility libraries are shared things which are shared over that feature. So if you need some services over the complete feature, this is your place.
So if this is the structure a feature exists of they are placed in a folder which can be named after the feature itself.
For example
├── .vscode
│   └── extensions.json
├── apps
│   ├── my-app
│   │   ├── ...
│   ├── my-app-e2e
│   │   ├── ...
│   └── .gitkeep
├── libs
    ├── profile // this is a folder
    │   ├── data-access
    │   │   └── // this is a lib
    │   ├── feature-profile
    │   │   └── // this is a lib
    │   ├── ui
    │   │   └── // this is a lib
    │   └── utility
    │       └── // this is a lib
The power of the ‘affected’ commands
This may sound weird in the beginning but makes absolutely sense when we think about a feature nx brings us which provides us the ability to only build/test/lint/… things which were affected from our specific changes.
You can find the commands in the package.json
    "affected:apps": "nx affected:apps",
    "affected:libs": "nx affected:libs",
    "affected:build": "nx affected:build",
    "affected:e2e": "nx affected:e2e",
    "affected:test": "nx affected:test",
    "affected:lint": "nx affected:lint",
    "affected:dep-graph": "nx affected:dep-graph",
    "affected": "nx affected",
So we create a branch and add our changes. The affected commands from nx can check which projects have changed, which projects rely on that changes and build them. ALl other non affected things do not get rebuild. This is a huge time and cost saver when it comes to builds in the cloud where you pay money for!
Creating libraries
You can create such libraries in the specific folder with the command
nx generate @nrwl/angular:library <name of the lib> --directory=<name of the feature>
For example this is the command to create a profile-feature lib in the profile directory.
nx generate @nrwl/angular:library profile-feature --directory=profile
The others are equivalent.
As said, the nx.json and angular.json files are being updated automatically. But more files are being touched: In the tsconfig.base.json there is a paths array which gets updated.
{
  "compilerOptions": {
    // ...
    "paths": {
      "@my-workspace/profile/data-access": [
        "libs/profile/data-access/src/index.ts"
      ],
      "@my-workspace/profile/profile-feature": [
        "libs/profile/profile-feature/src/index.ts"
      ],
      "@my-workspace/profile/ui": ["libs/profile/ui/src/index.ts"]
    }
  },
}
This is the path the libraries are available from.
Consuming libraries
This path points to the entry file of the library index.ts. The index.ts file exports all the types you want to export from that library. For the start this is only the module.
export * from './lib/profile-ui.module';
Every time you want to import something from the lib via ES6 import statement like import { something } from '...' it has to be exported via this index.ts file.
If you want to import a component you would do this over the exports array of the Angular module like we separated in modules before. No changes to the behavior of Angular modules only because we introduced a lib! You import the Angular module from the lib in the Angular module of your app and can consume everything which gets exported by the module.
For example you want to use a component called MyComponent which is placed in the profile/ui lib in the profile/profile-feature lib:
Example for the export via Angular Module
import { NgModule } from '@angular/core';
import { CommonModule } from '@angular/common';
import { MyComponent } from '...'

@NgModule({
  imports: [CommonModule],
  declarations: [MyComponent]
  exports: [MyComponent]
})
export class ProfileUiModule {}
Then this component MyComponent can be used in the app by importing the Angular module like regular over the imports array.
import { NgModule } from '@angular/core';
import { CommonModule } from '@angular/common';
import { ProfileUiModule } from '@my-workspace/profile/ui'

@NgModule({
  imports: [CommonModule, ProfileUiModule],
})
export class ProfileProfileFeatureModule {}
By importing the ProfileUiModule everything the Angular module exports (!) can be used. If it does not get exported, it can not be used.
Pay attention to the path we are importing from. It is ... from '@my-workspace/profile/ui'. This path is defined in the paths array and points to the index.ts file. Visual Studio Code for example sometimes tries to fool you pointing to the direct path, which is not correct.
// This is not the correct import path!
import { ProfileUiModule } from './../../../ui/src/lib/profile-ui.module';

// This is the correct import path!
import { ProfileUiModule } from '@my-workspace/profile/ui'
import { NgModule } from '@angular/core';
import { CommonModule } from '@angular/common';

@NgModule({
  imports: [CommonModule, ProfileUiModule],
})
export class ProfileProfileFeatureModule {}
The abstraction happens in the paths array in the tsconfig.base.json which is consumed first. if it is not found then the path is looked up in the node_modules folder.
However if you need to import a type directly not over Angular modules because you need it directly, this has to be exported via the index.ts file!
// index.ts
export * from './lib/profile-ui.module';
export * from './path/to/my/type'
Can be imported in the desired file with the path of the lib @my-workspace/profile/ui in this example.
// import via ES6 statement
import { SomeType } from `@my-workspace/profile/ui`
There are automatic linting rules installed to check this for you. But keeping an eye on it in the first place can not be wrong ;-)
Shared functionality
In an application we always have functionality which has to be spread application wide or feature wide. This shared things can be app specific and completely shared generic functionality.
First of all we create a shared folder underneath the libs folder.
If the shared thing is app(s) specific and used by apps we can create a new app specific library in a folder under the shared one. How would this look like?
nx generate @nrwl/angular:library completely-generic --directory=shared
Would bring us
.
├── apps
│   ├── my-app
│   │   └──...
│   └── my-app-e2e
│       └──...
├── libs
│   ├── profile
│   │   └── ...
│   ├── shared
│   │   └── completely-generic
│   │   │   └── ...
├── ...
This is where completely shared things can be kept.
If things can not be done generic we create a library in a new folder under shared.
The command
nx generate @nrwl/angular:library not-generic-but-shared --directory=shared/featureName
would give us exactly this:
.
├── apps
│   ├── my-app
│   │   └──...
│   └── my-app-e2e
│       └──...
├── libs
│   ├── profile
│   │   └── ...
│   ├── shared
│   │   ├── completely-generic
│   │   │   └── ...
│   │   └── feature-name
│   │       └── not-generic-but-shared
│   │           └── ...
│   └── .gitkeep
├── ...
Using linter to check your architecture
To ensure that a specific app/lib can only access specific other libs you can ensure that with the @nrwl/nx/enforce-module-boundaries rule which automatically being applied for you. If you check the .eslint file you will find
{
   //...
  "overrides": [
    {
      "files": ["*.ts", "*.tsx", "*.js", "*.jsx"],
      "rules": {
        "@nrwl/nx/enforce-module-boundaries": [
          "error",
          {
            "enforceBuildableLibDependency": true,
            "allow": [],
            "depConstraints": [
              { "sourceTag": "*", "onlyDependOnLibsWithTags": ["*"] }
            ]
          }
        ]
      }
    },
   //...
  ]
}
What we can do here is telling that a lib/app with the tag x can only depend on libs with tag y.
Those tags can be set in the nx.json file.
{
  // ...
  "projects": {
    "my-app": { "tags": [] },
    "my-app-e2e": { "tags": [], "implicitDependencies": ["my-app"] },
    "profile-data-access": { "tags": [] },
    "profile-profile-feature": { "tags": ["lib:profile:feature"] },
    "profile-ui": { "tags": ["lib:profile:ui"] },
    "shared-completely-generic": { "tags": [] },
    "shared-feature-name-not-generic-but-shared": { "tags": [] }
  }
}
Now we can ensure that the profile-profile-feature lib only depends on the profile-ui lib for example:
{
   //...
  "overrides": [
    {
      "files": ["*.ts", "*.tsx", "*.js", "*.jsx"],
      "rules": {
        "@nrwl/nx/enforce-module-boundaries": [
          "error",
          {
            "enforceBuildableLibDependency": true,
            "allow": [],
            "depConstraints": [
              { "sourceTag": "lib:profile:feature", "onlyDependOnLibsWithTags": ["lib:profile:ui"] }
            ]
          }
        ]
      }
    },
   //...
  ]
}
This is only an example and should be used like you have it in your architecture.
You can start this linting process with the command provided in your package.json
"lint": "nx workspace-lint && ng lint",
Further steps
This is only a brief overview of nx can do for you. Nx also holds a dependency graph for your current architecture where you can visually see which app/lib relies on which lib and find mistakes, it has the affected commands, the built in latest tools the latest checks which protect you and your team from common mistakes. A linter and code formatter is included as well to give you everything on the hand to start your Angular application.
I once again refer to the book Enterprise Monorepo Angular Patterns, by Nitin Vericherla & Victor Savkin. and really recommend this to read.
Thanks and hope this helps
Fabian